
Sunday, 2 February 2014
Saturday, 1 February 2014
Texture Creation - Stone Floor
As an environment artist I am tasked with not only the development of the 3D assets but also the textures maps to go with them, The texture is what really defines the model as a noticeable asset, I decided to start working on a main texture for my scene, the stone work for the floor as the concept show the scene is not completely full of various assets, the key to this scene is the sense of realism within the environment itself and this will take place within the textures and later on shader work.
I found myself a simple stone floor image, my main issue with this image is that it was not seamless this means when I start putting parts together there would be seams on the 3D asset which is not something I want as this is very noticeable, So I used a technique in-which you can turn an image into a seamless one, using simple tools within Photoshop such as the blend and clone tool, first you must offset your image, for example I made this image so that it was 1024x1024 pixels, use the offset filter and offset but
512x512 and this will create an image which is seamless on all four outer sides, so once the seams within the middle of the image are cloned/blended you have yourself an seamless image.
 ,
,
 |
| Stone Floor |
512x512 and this will create an image which is seamless on all four outer sides, so once the seams within the middle of the image are cloned/blended you have yourself an seamless image.
 |
| Offset |
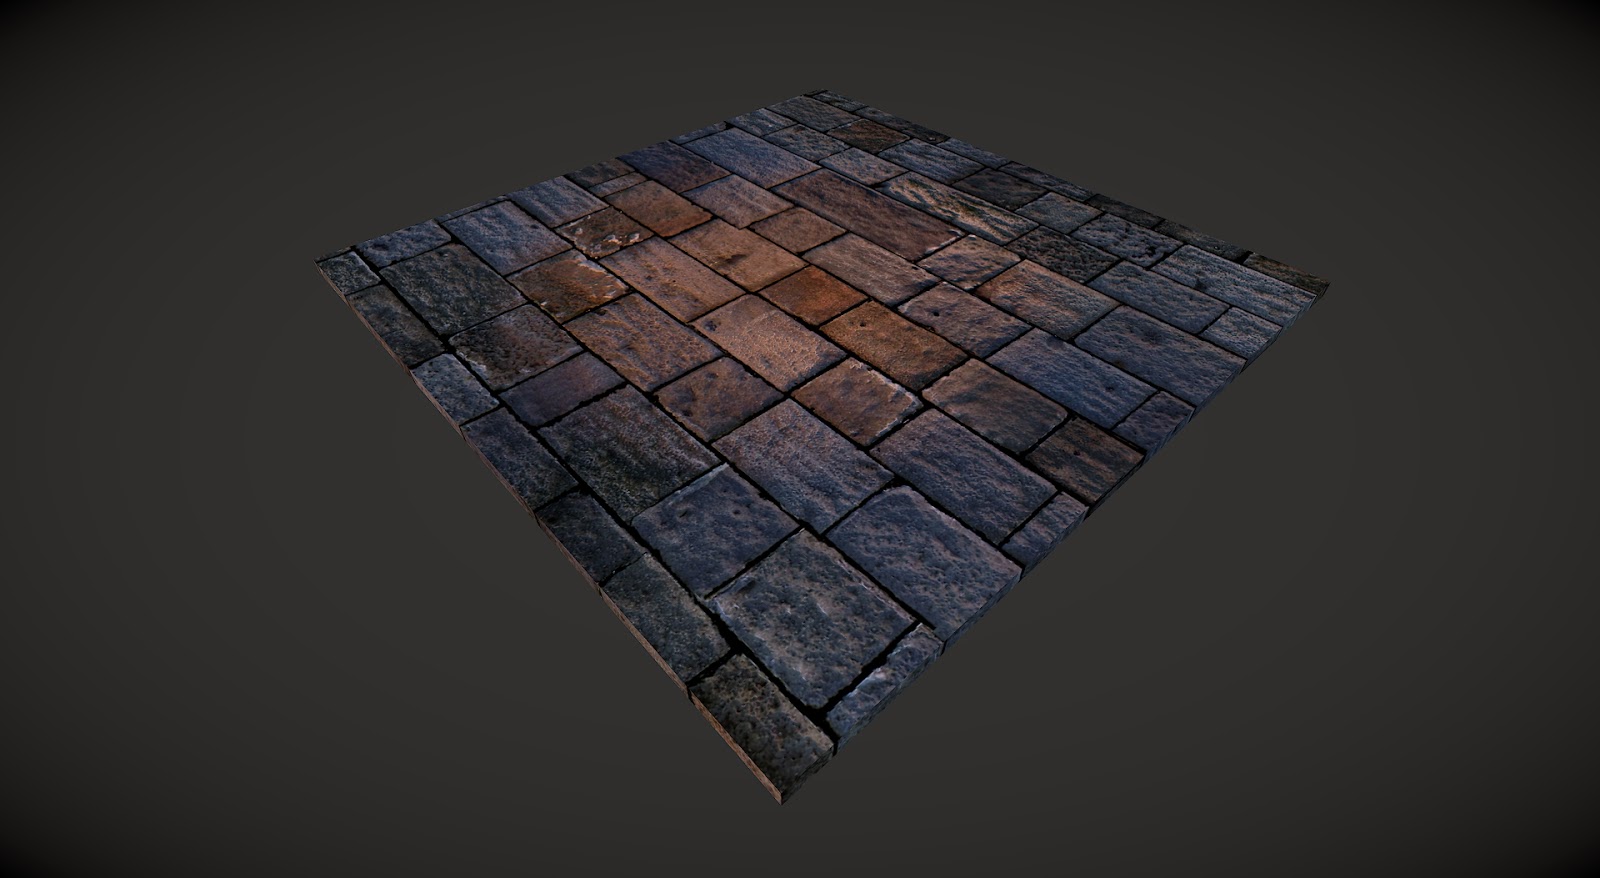
Once I finished this process I was able to develop the texture so that it fits within my scene and concept used. Image below shows Diffuse,Spectacular and normal maps within marmoset.
 |
| Stone Floor - Render |
Normal Map
After looking back at my stone floor although I am happy with the overall texture e.g. Diffuse and Specular maps I still think the normal map is too flat, so I decided to try and increase the intensity of the normal map using Photoshop, I layered the normal map over top one another within the canvas and overlay them using Hard light and Soft light to get a more intense normal map, Image below showing the increased normal map, this may be too intense but it has definitely added the extra depth I wanted.
Asset List
Asset
List
Main assets
- · stone tower
- · medieval buildings (modular)
- · stone floor (Texture, single stone pieces)
- · Wooden floor (texture, single planks)
- · Stone bridge
- · market stand/store
- · barrack tower
- · city wall (stone)
Props
- · Barrels
- · crates/Boxes
- · Torches
- · sand-bags
- · wooden cart
- · Wooden Barge
- · Stone Doorway
- · signs (tavern)
- · Flags (cloth physics)
- Lanterns
environmental
- · water (shader)
- · weather (Rain)
- · puddles (shader)
- · vertex painting
- · lighting
Friday, 31 January 2014
Block-Out Test Sequence
Image below showing simple sequence of my scene, as you can see the overall scene is blocked out the only issue is I need to fill up the scene with various props, the concept I've chosen doesn't show many items/props within the scene and while looking at the block-out I have produced I do not like the open blank space whether this changes when textures are applied, I still think I need to plan ahead and start thinking of various pros which would fit well within this scene.

Monday, 27 January 2014
Reference Part 2.
Before I start developing my assets and textures for said assets, I really want to look at various pieces of reference that can inspire my work even though I have my concept art which is what I initially will be based from, to gain that extra little bit of detail within my I really need to look at other areas which depict similar environments to my own.
Ref.1 Founded "http://alexseifert.blogspot.co.uk" Concept art showing a medieval village as before I have highlighted the areas of importance which I can use as inspiration for my 3D work, I have highlighted the buildings as this is what I need reference for most as my concept art lacks in detail for theses types of medieval buildings, I have also highlighted the floor as it shows a cobble type stone flooring which personally would fit perfectly within my 3D environment, this type of floor can offer a wide range of visual feedback such as mold in-between the individual stone this also could take effect when using water, so I will defiantly look into this type of texture for the floor.
 |
| Ref.1 Medieval Village Concept - http://alexseifert.blogspot.co.uk
I will be looking to find reference for Medieval Town Squares/centers this will help me refine the area of my scene which is open to interpretation, I think such things like little market stools would help refine the overall scene and varied buildings, I hope to produce several buildings from modular pieces with varied texture effects.
 Ref.2 taken from http://www.conceptart.org/forums/showthread.php?t=196140&page=8, this piece of reference is exactly what I was looking for showing a town market I think this will be a great addition to be added into my scene, as you can see I have highlighted the building on the right as the more building reference I have the better the 3D assets I produce should be we extra detail and varied structuring.  Ref.3 taken from http://www.conceptart.org/forums/showthread.php?t=196140&page=8 |
Sunday, 26 January 2014
Development Process - Block-out
The block-out stage of level design is very important, it allows us as artists to understand how the level/scene should flow, I decided to work on a quick block-out scene which I always refereed back to my chosen concept art, In doing a block-out during the early stages of development it enables me to understand the whole structure of my scene from a primitive level as you can see I have only used very basic primitive shapes to produce this block-out and yet you can really see it coming to life even at this simple stage.
Blocking out allows me to understand the positioning, scale and proportions of each asset within UDK, Although the sole purpose of creating this scene is more on an art based level, I feel always working as if i'm developing a playable level will over-time refine my level design skills which I personally think is a great asset to add to my skill-set.
As you can see in the image below, The block-out is at its simplest level, it shows the main sections of the concept art, this will help me understand what is needed in the areas in-which the concept art doesn't show but in working with this block-out and various concept references, I will be able to complete this scene.
 |
| Block-Out - UDK
I started added extra detail to my block-out I did not want to spend too much time with the block-out as its only a simple basis for the final product, I just need to gain more visual information in how I intend to construct my scene,as you can see in the image below there is not a massive difference apart from a few re-positioning and various little changes.
|
 |
| Block-Out .2 - UDK
During the block-out I needed to look at certain areas in-which the concept lacked visually, as you can see in the image below in direction of the arrow we can not see in that direction so I have to interpenetrate what might be there.
 |
 |
| Sewer Entrance - Ref. |
So I started looking at various concept art and images from medieval cities or towns, as the concept shows a lake of sorts or canal, So i started looking at sewer entrances as I feel this would would perfectly within this scene and actually make sense in the real world, I didn't want to add something randomly just for the sake of it I want my scene to make sense to the viewer.
The reference to the right is an image I found I really like this as a sewer entrance, it can add a lot to the scene in terms of the water flow, depending if I want a calm water flow or a more rapid one, which leads into the city, as it travels through the sewer gate the water if faster could splash against the entrance created a more realistic water flow obliviously this would rely on a well executed water shader but it allows me to add more ideas into this scene to create a more dynamic one.

Block-out showing sewer entrance, I may need to go back and look at the overall scale as it does seem to larger although this works I am not fully convinced it fits in with the scene as I would like.
Saturday, 25 January 2014
Gaining a Visual Style - Technology 1. Marmoset Toolbag
 |
| Concept Door - Highlight |
Before I start working on a simple block-out for my environment, I wanted to take some time looking into the the visual style I will be aiming to create during the development, The image to the left depicts a highlighted area from the concept art, A wooden door surrounded by a stone archway. I felt this was a small piece I could work on and still get an understanding of what kind of visual style I will be aiming for.
 |
| WIP - Medieval Asset |
This also brings me to a piece of technology which I found to be very useful. Marmoset Tool-bag which is full-featured real-time editor and real-time renderer which provides very useful tools, for example scene editing allows you to control your mesh,lights and cameras and allowing for an high-quality real-time render to really show off your work as a 3D artist.
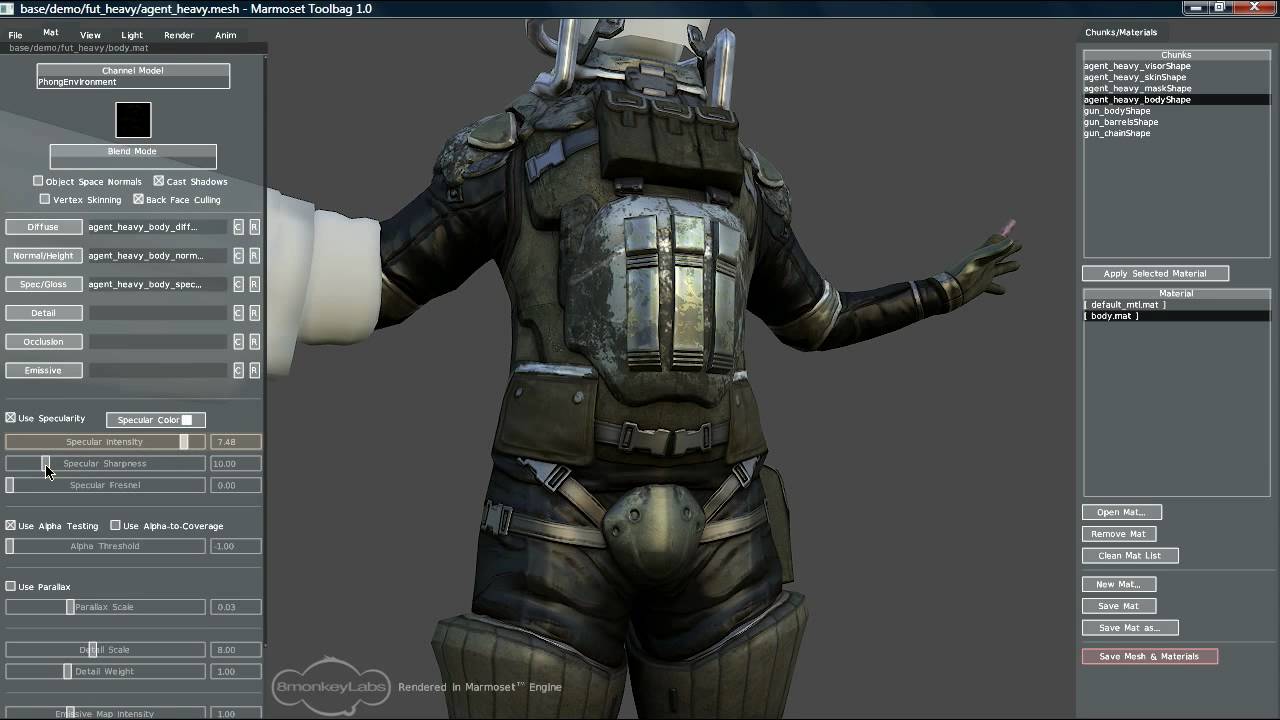 |
| Marmoset Toolbag |
I find this very useful, during the development process, as currently I use UDK (Unreal Engine) for my real-time work, the process to import my assets and create simple materials can be a tedious process when all I want to do is to be able to see my asset within a real-time environment, Marmoset allows me to simply upload my assets (fbx. or obj.) and apply all my texture maps which updates in the view-port instantly.
Subscribe to:
Posts (Atom)